Getting box dimensions wrong is the most expensive mistake in packaging. An
oversized box inflates freight on every order you ever ship, and an undersized one crushes stock
before it reaches the customer. Both are avoidable with five minutes of measuring.
This guide covers the order dimensions are written in, the difference between internal and
external measurements, how to measure a box you already have, and what to send a supplier so your
quote comes back right the first time.
The Standard Order: Length × Width × Depth
Packaging dimensions are always written in the same order, and getting it wrong is the fastest
way to receive a box that is the right size but the wrong shape.
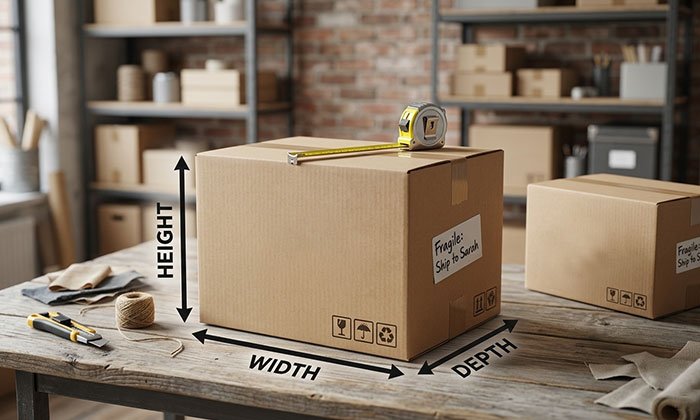
- Length — the longer of the two sides of the box opening.
- Width — the shorter of the two sides of the opening.
- Depth (or height) — the distance from the opening down to the base.
So a box written as 8 × 6 × 4 has an opening of 8 inches by 6 inches, and is 4 inches deep. Write
the same box as 4 × 6 × 8 and you have described something completely different — a tall, narrow
box with a small opening.
Internal vs External Dimensions
This is the single most common source of packaging errors, and it matters most on thicker
stocks. Corrugated board can be several millimetres thick, so a box with 8-inch internal
dimensions measures noticeably more on the outside.
Which one you quote depends on what you are solving for:
| Use | Which dimension | Why |
|---|---|---|
| Ordering custom boxes | Internal | The box has to fit your product, not the other way round |
| Calculating shipping | External | Carriers bill on the outside of the parcel |
| Retail shelf planning | External | Shelf space is measured edge to edge |
| Designing inserts | Internal | The insert sits inside the walls |
Unless you say otherwise, assume a packaging quote is in internal dimensions. If you are
sending external measurements, label them clearly — it takes one line and saves a reprint.
How to Measure an Existing Box
If you are replacing packaging you already use, measure the box you have rather than guessing
from the product:
- Open the box flat and lay it on a level surface.
- Measure the opening across its longer side — that is your length.
- Measure the opening across its shorter side — that is your width.
- Measure from the top edge straight down to the inside of the base for depth.
- Measure from the inside of the walls, not the outside, and note that you did.
For an irregular product, measure at its widest point in each direction, then add clearance for
whatever protection you plan to use — typically a quarter inch each side for a light insert, more
for foam.
Five Mistakes That Cost Money
- Mixing units. Half the drawing in inches and half in millimetres is more common than
you would think. Pick one and state it. - Forgetting the product tolerance. A box measured to the exact product size will not
close once the product has a label or a shrink wrap on it. - Rounding down. Rounding 6.4 to 6 tightens the fit by nearly half an inch across the
box once both sides are counted. - Ignoring dimensional weight. An oversized box costs more to ship every single time,
and that cost dwarfs the price of the box itself. - Not testing before a full run. A single sample costs very little next to reprinting
five thousand boxes.
Sending Dimensions to Your Packaging Supplier
A clear brief gets a faster, more accurate quote. Include:
- Dimensions in L × W × D order, with the unit stated.
- Whether they are internal or external.
- The product going inside, and its weight.
- Your box style, or a description of how you want it to open.
- Quantity — pricing per unit changes significantly with volume.
If you are unsure about any of it, send the product measurements and let the packaging team work
back from those. That is what the free design support is for, and it is a far cheaper way to find a
problem than discovering it on delivery.